

·
Why Upper Yosemite Falls is Worth the Grueling Climb
I’m going to be honest—this hike kicked my ass. The Upper Yosemite Falls trail gains 2,700 feet over 3.8 miles, which translates to relentless switchbacks that’ll have your quads screaming by mile two. But standing at the top, watching 1,430 feet of whitewater thunder into the valley below while Half Dome looms across the granite expanse, I got it. This is why people hobble down this trail with demolished knees and zero regrets.
Most Yosemite visitors photograph the falls from the valley floor. Up here, you’re level with the lip where Yosemite Creek launches into space. The mist soaks you even 50 feet back from the edge during spring runoff.
The trail doesn’t ease you in. It climbs immediately through oak woodland, then exposed granite sections where the sun hammers down from April through October. I started at 7 AM in June and still got cooked on the upper switchbacks.
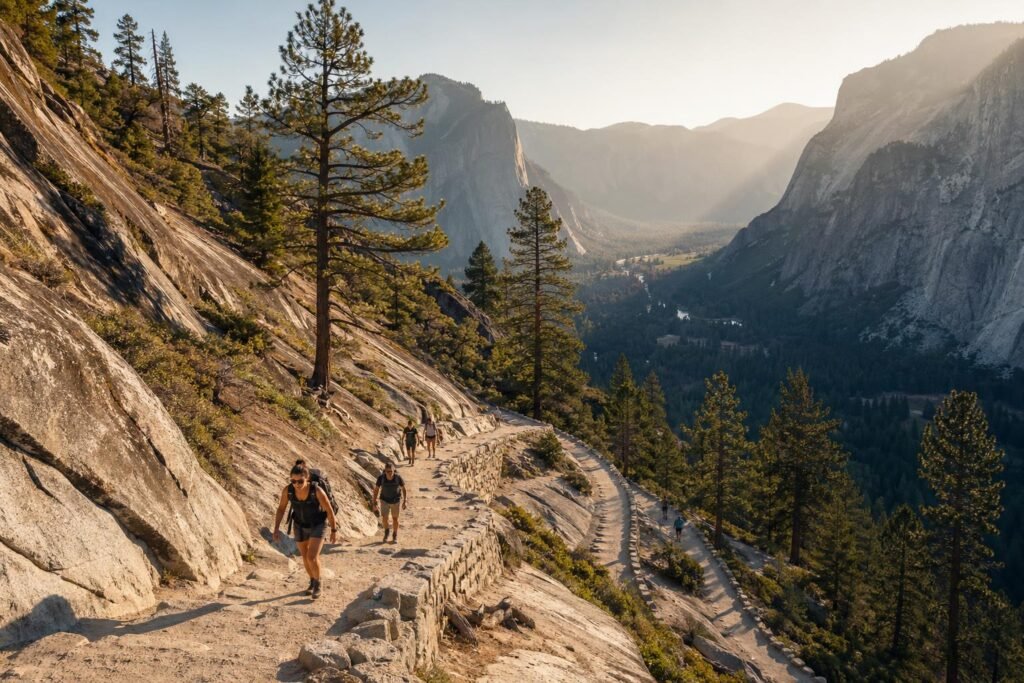
Hikers ascending endless granite switchbacks with the forested valley floor dropping away 1,500 feet below, Nevada Fall visible in the distance
But here’s what made it worth every step: you’re hiking through Yosemite’s vertical geography. The valley floor drops away in layers—meadows, then pine canopy, then the Merced River shrinking to a silver thread. By the top, you’re seeing the park the way John Muir saw it, from rim height where the scale finally makes sense.
Trail Overview: What to Expect on the Ascent
The trailhead sits next to Camp 4, right where climbers gear up for El Capitan routes. You’ll share the first mile with dozens of other hikers—this is Yosemite’s most popular strenuous day hike. The trail wastes no time, climbing through oak and bay laurel on stone steps that feel endless.
Columbia Rock hits at mile 1, elevation 5,031 feet. This is your first payoff: a granite platform with direct views of Half Dome and straight down into Yosemite Valley. Maybe 40% of hikers turn around here, which isn’t a bad call if you’re testing your legs.
Past Columbia Rock, the real work begins. The trail attacks the cliff face through 50+ switchbacks carved into granite. There’s no shade here. On summer afternoons, the stone radiates heat like a griddle. I counted switchbacks to distract myself from my heart rate—gave up around number 30.
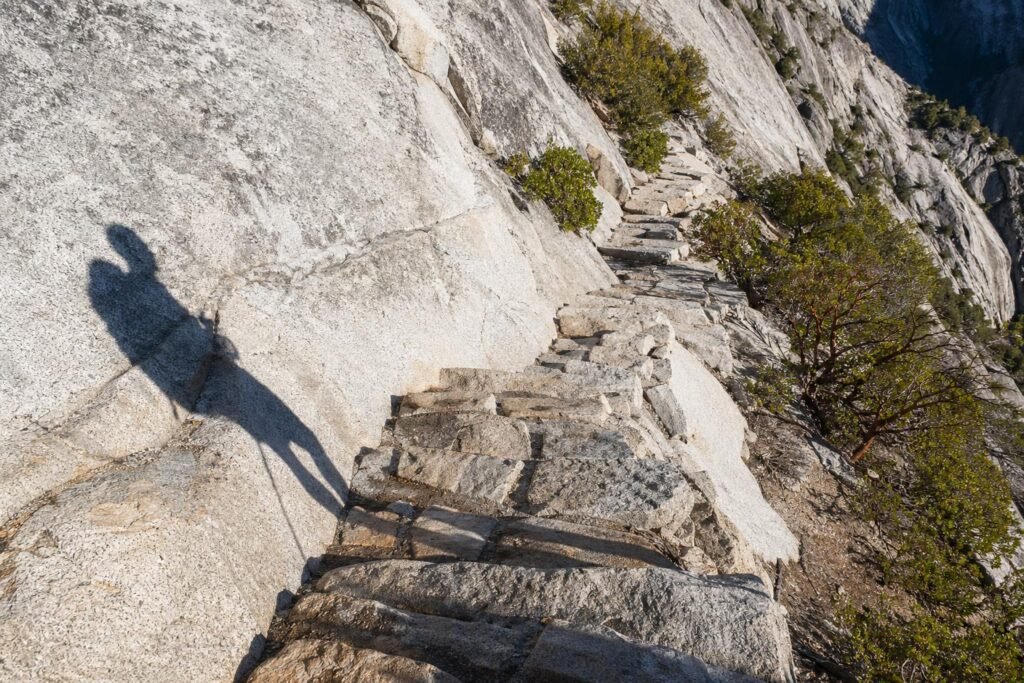
Worn stone steps zigzagging up blank granite face with scattered manzanita bushes clinging to cracks, one hiker’s shadow stretching long across the rock
Around mile 2.5, the grade moderates slightly and pines return. You’ll catch glimpses of Upper Yosemite Fall through the trees, hearing the roar get louder with each switchback. The final half-mile flattens along the creek before reaching the overlook platform at the waterfall’s brink.
The trail is well-maintained but unforgiving. Every step up is a step you’ll feel on the way down. Your knees will have opinions about the descent. Trekking poles aren’t optional—they’re the difference between walking funny for two days versus walking funny for five.
Best Time to Hike and Seasonal Considerations
April through early June. That’s your window for the full spectacle.
I’ve done this hike in both May and September, and they’re completely different experiences. Late spring means snowmelt thunder—Upper Yosemite Falls at 2,425 feet is among the tallest waterfalls in North America, and when it’s cranking, you’ll hear the roar a quarter-mile away. The mist soaks the trail sections near the top. Your photos will have that proper wall of white water.
By August, it’s often a trickle. Some years it’s completely dry by September. Still worth hiking for the views across the valley to Half Dome and down to the valley floor 2,700 feet below, but you came for a waterfall.
Crowds peak on spring weekends—expect 200+ people on trail by 9am. I’ve started at 6:30am in May and had the first mile nearly to myself. The parking lot at Yosemite Falls Trailhead (off Northside Drive, west of Yosemite Village) fills by 8am on Saturdays.
Hikers ascending the exposed granite switchbacks in the first mile, with pine trees clinging to cracks and the distant valley floor visible through gaps in the forest.
Fall and winter change the equation. No waterfall crowds, but you need microspikes above Columbia Rock once snow hits—usually November through April. I’ve met people turned back at switchback 40-something because they didn’t bring traction. The Park Service doesn’t close this trail in winter, but check current conditions at the Wilderness Center before committing.
One practical thing: if you’re here in peak season and find the trailhead lot full, the day-use parking area near Yosemite Village is a ten-minute walk. Don’t park illegally—the rangers ticket aggressively, and it’s $280 last I checked.
Physical Preparation and Fitness Requirements
This isn’t a walk. It’s 7.2 miles round trip with 2,700 feet of elevation gain, almost all of it in the first 3.6 miles going up.
Your quads will burn on the descent—that’s where most people underestimate the difficulty. I watched a guy in his fifties, clearly in decent shape, sitting on a rock at mile 5 on the way down, cursing his knees. The relentless downhill on granite is harder than the climb for a lot of people.
If you can’t comfortably hike 8-10 miles with 2,000+ feet of gain, train first. I’m serious. Stair climbers help. Loaded backpack walks on inclines help more. This trail punishes weekend warriors who haven’t done anything vertical in months.
The elevation matters too. The trailhead starts around 4,000 feet, you top out at 6,700 feet. If you’re coming from sea level and hiking the day after you arrive, you’ll feel it in your lungs. I’ve done that mistake—spent the first two miles sucking wind while people from Denver breezed past.
Most people take 6-8 hours round trip including breaks. I’m a fairly fast hiker and it took me 5.5 hours with a 30-minute lunch at the top. If you’re not back to the trailhead before dark and you didn’t bring a headlamp, you’re in for a miserable time on those stone steps.
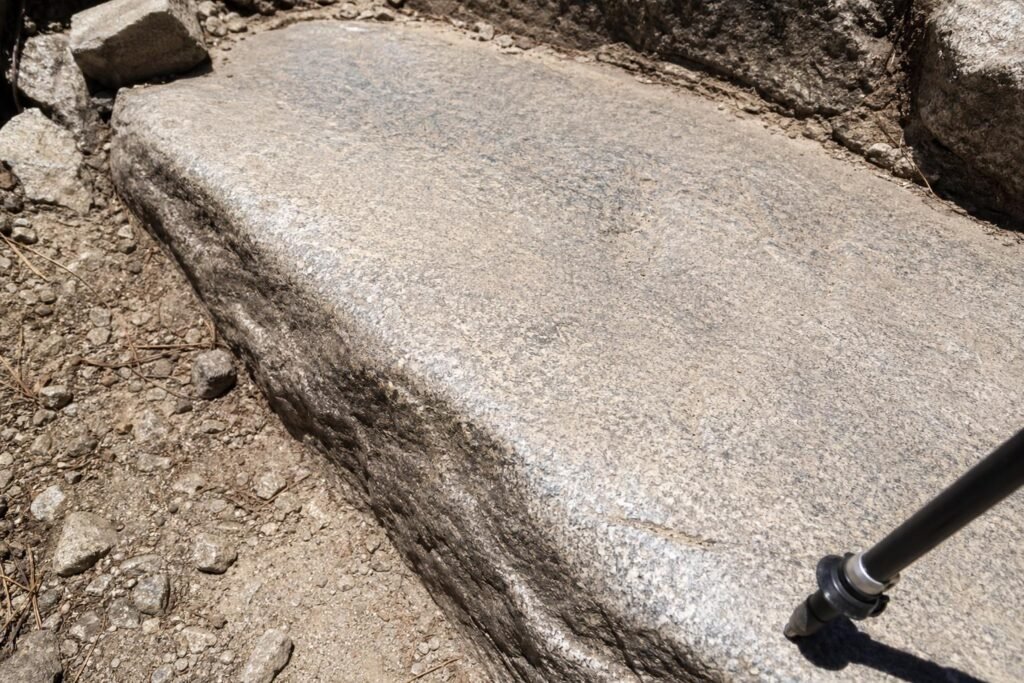
Worn granite step on a steep switchback section, showing the polished surface from thousands of boots, with a trekking pole tip visible in the corner of the frame.
Some people here train specifically for this trail by doing it multiple times in a season, then move on to a ↗ guided high-elevation hike in Yosemite to hit the Cathedral Range. The fitness carries over—if you can handle Upper Yosemite Falls comfortably, you’re ready for most of the park’s challenging trails.
Bring more water than you think. Two liters minimum, three if it’s warm. There’s a creek crossing around mile 1.5, but it’s seasonal and I wouldn’t trust it in late summer. I’ve passed people rationing their last half-bottle with a mile still to climb. Don’t be that person.
Essential Gear and What to Pack
Water is the big one here. I bring 3 liters minimum, sometimes 4 if it’s hot. There’s no reliable water source on the trail, and the exposed switchbacks will drain you faster than you think.
Your legs will thank you for trekking poles. The 2,700-foot descent pounds your knees, and poles cut the impact by maybe 25%. I learned this the hard way my first time up—couldn’t walk normally for three days after.
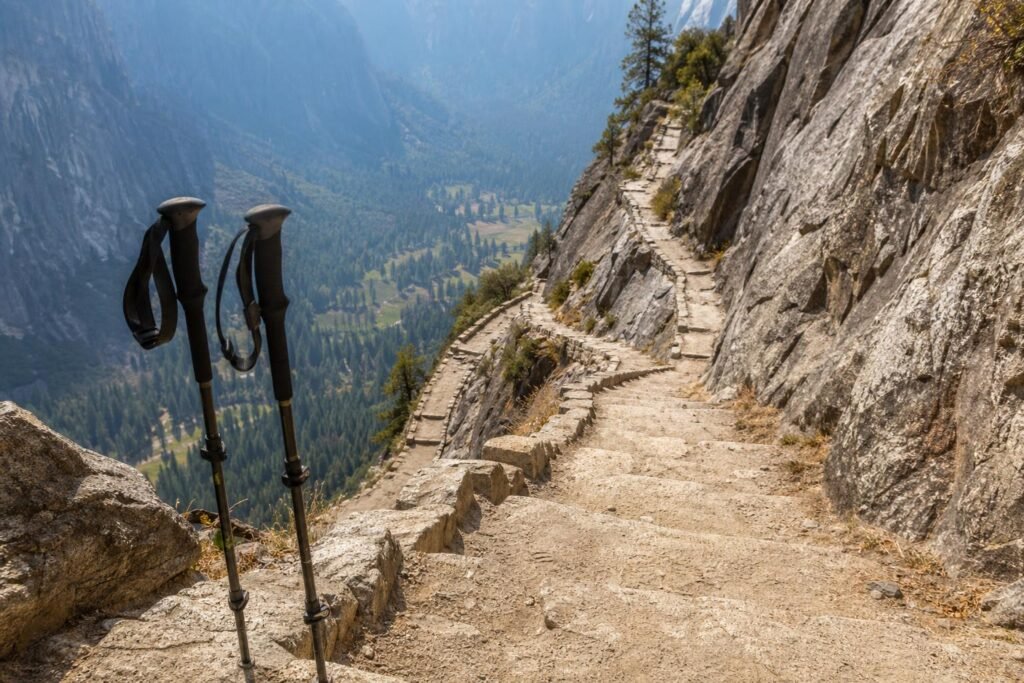
Dusty granite switchbacks zigzagging up a sheer cliff face, hiking poles planted in foreground, valley floor thousands of feet below in soft haze
Sun protection isn’t optional. Wide-brimmed hat, sunglasses, SPF 50 minimum. The trail is completely exposed after the first mile, and at 7,000+ feet the UV is no joke. I watched a guy at the top whose neck looked like raw hamburger.
Layering matters more than you’d expect. Start cold at 4,000 feet in the valley, maybe 50°F at dawn. Top out at 7,000 feet where it might be 35°F with wind. Then descend back into 75°F afternoon heat. I go with: base layer, light fleece, windbreaker shell. All in the pack after the first hour of climbing.
Pack salty snacks—nuts, jerky, crackers. Not just energy bars. Your body dumps sodium like crazy on this climb, and I’ve seen people get wobbly from electrolyte depletion even when they’re drinking plenty of water.
Your phone works for navigation, but bring a battery pack. The GPS tracking and photos will kill your battery by midday. I also carry a paper map from the visitor center—old-school backup if your phone dies.
Microspikes if you’re going before June. I got caught in May once with snow on the upper sections, no traction, turned around at Eagle Point. Not worth the risk.
Trail Safety Tips and Common Mistakes to Avoid
Start early. I mean 6 AM early, earlier if you can manage it. The afternoon sun on those exposed switchbacks is brutal, and you want to be descending by 1 PM. I’ve passed people struggling upward at 3 PM looking absolutely cooked.
The altitude hits some people hard. You’re going from 4,000 to 7,000 feet, gaining elevation faster than your body wants. Headache, nausea, dizziness—if you feel off, turn around. No shame in it. I watched someone push through obvious altitude sickness once and nearly pass out at Columbia Rock.
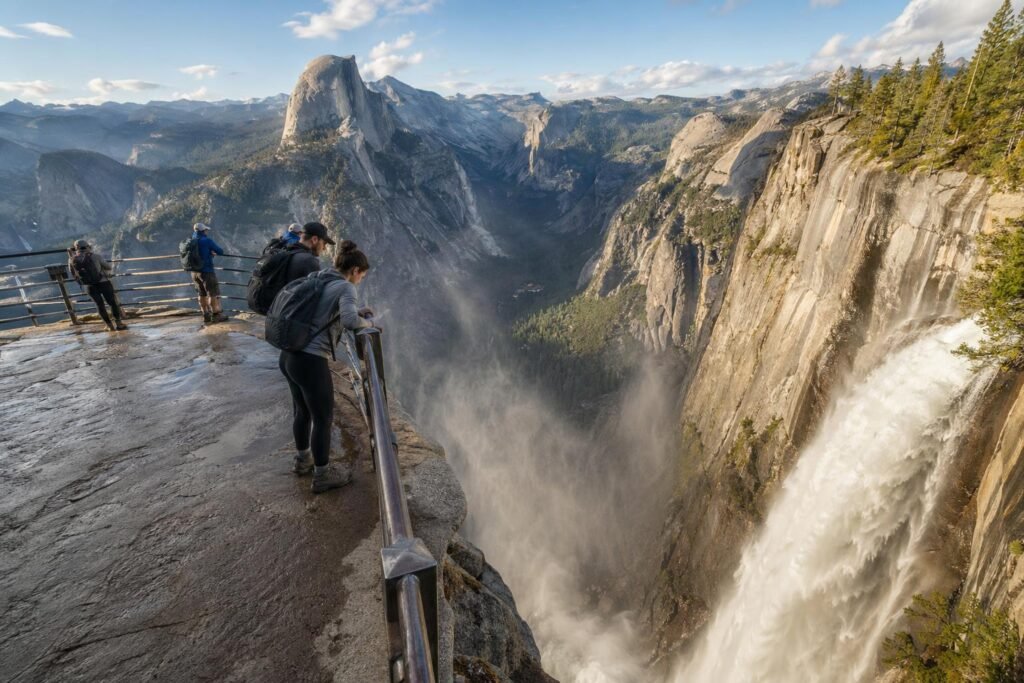
Metal railing at cliff edge with massive waterfall plunging into mist below, few hikers gripping rail looking down, granite dome visible across valley
Hydrate before you feel thirsty. By the time your mouth is dry, you’re already behind. I take three big swigs every 15 minutes whether I want to or not. Sounds excessive but it works.
The railings at the top exist for a reason. Every year someone gets too close to the edge trying to get the perfect photo. The rock is polished smooth from water and foot traffic—it’s slippery even when dry. I stay behind the railings. The view is just as good.
Don’t underestimate the descent. Your quads will be screaming by the bottom, and that’s when people get sloppy and roll ankles. I actually go slower on the way down than up. After tackling this trail, some hikers want another challenging high-country adventure—a rock climbing experience at El Capitan’s base offers a completely different way to engage with Yosemite’s vertical granite world, with guides who’ll teach you the basics right where the big walls start.
Check trail conditions at the visitor center before you go. Spring runoff can make the top section sketchy with spray and slick rock. Rangers close it sometimes. Also, they’ll tell you about bear activity—I’ve never seen one on this trail but they’re around.
Beyond Upper Falls: Extending Your Yosemite Adventure
If you’re still standing after Upper Yosemite Falls and want more punishment, the trail doesn’t actually end at the overlook. You can continue another 2.5 miles to North Dome, which adds 1,000 feet of climbing and drops you right above Half Dome with nothing between you and the valley floor except air.
I’ve done this extension twice. Once in June when my legs were already cooked from the Falls climb—bad call. Once in September when I started at 5am specifically for North Dome—much better. The trail traverses through Jeffrey pine forest and opens onto this granite platform where you’re essentially level with Half Dome’s face. Completely different perspective than you get from anywhere else in the valley.
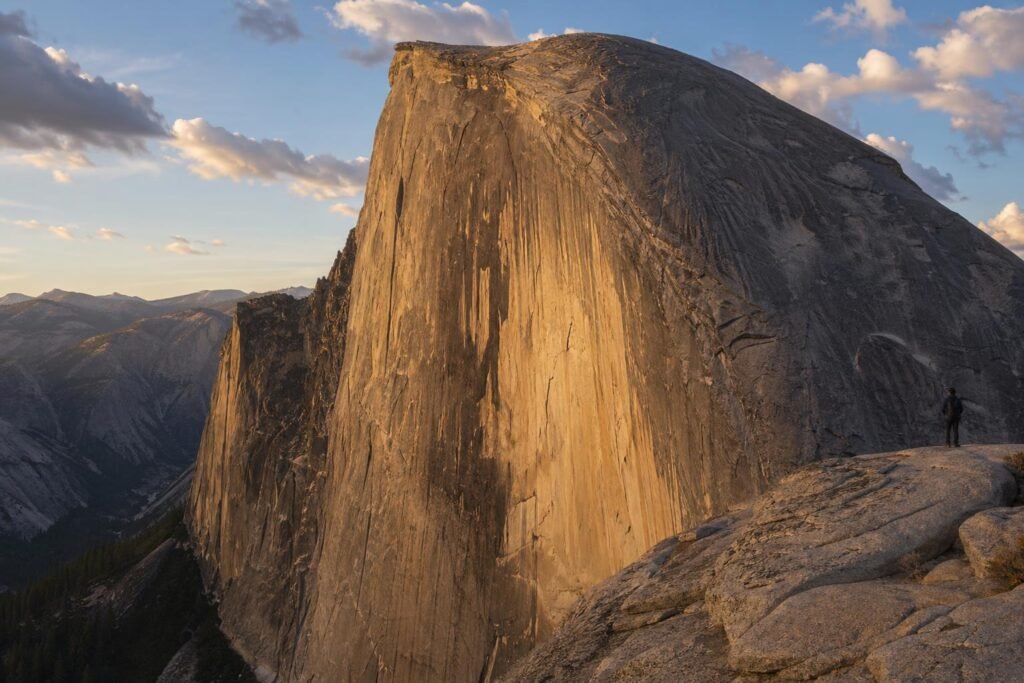
Half Dome’s northwest face fills the frame at eye level with Tenaya Canyon dropping away below, a lone hiker silhouette on the granite edge for scale
Fair warning: this makes it a 14-mile round trip with 4,800 feet of gain. That’s a legitimate suffer-fest. Most people doing North Dome actually approach from Tioga Road instead, which cuts the hike in half.
If North Dome sounds excessive but you’re not ready to call it, Four Mile Trail is the natural next challenge. It’s 4.8 miles one-way to Glacier Point with 3,200 feet of climbing—basically Upper Falls’ annoying younger sibling. The switchbacks are relentless but the views across to Yosemite Falls make it worth it. I’ve met people who do both in one day. I am not those people.
Mist Trail to the top of Vernal and Nevada Falls is another classic. It’s actually less elevation gain (2,000 feet) but the granite staircases next to Vernal can be just as brutal on the knees. Way more crowded though—you’re dodging tourists in flip-flops near the bottom.
For something completely different but still adventure-focused, I spent an afternoon doing a rock climbing experience at El Capitan’s base with a guide who’d actually climbed The Nose. Didn’t make it more than 40 feet up, but learning the techniques while staring at those 3,000-foot walls gave me a whole new appreciation for the people I’d been watching through binoculars from the valley. ↗ rock climbing experience at El Capitan’s base
Half Dome is the other mega-hike everyone asks about. It’s 14-16 miles depending on your route with 4,800 feet of gain, plus cables at the end. But you need permits, and the lottery system is a nightmare. I’ve entered it six times and gotten picked once.
If you’re spending multiple days, honestly just spreading your big hikes across different mornings works better than cramming. Upper Falls one day, recover with something mellow like Mirror Lake loop, then hit another challenging trail when your legs remember how to work.
Trailhead Logistics: Parking, Permits, and Getting There
The Upper Yosemite Falls trailhead is right next to Camp 4 on Northside Drive, about half a mile west of Yosemite Village. There’s a small parking lot that holds maybe 15 cars. It fills by 7am May through September. By 8am you’re circling like a vulture hoping someone’s finishing early.
I’ve gotten that parking spot exactly twice in probably fifteen attempts. Every other time I’ve parked in the much larger day-use lots near Yosemite Village or Curry Village and either walked the extra mile to the trailhead or caught the free valley shuttle.
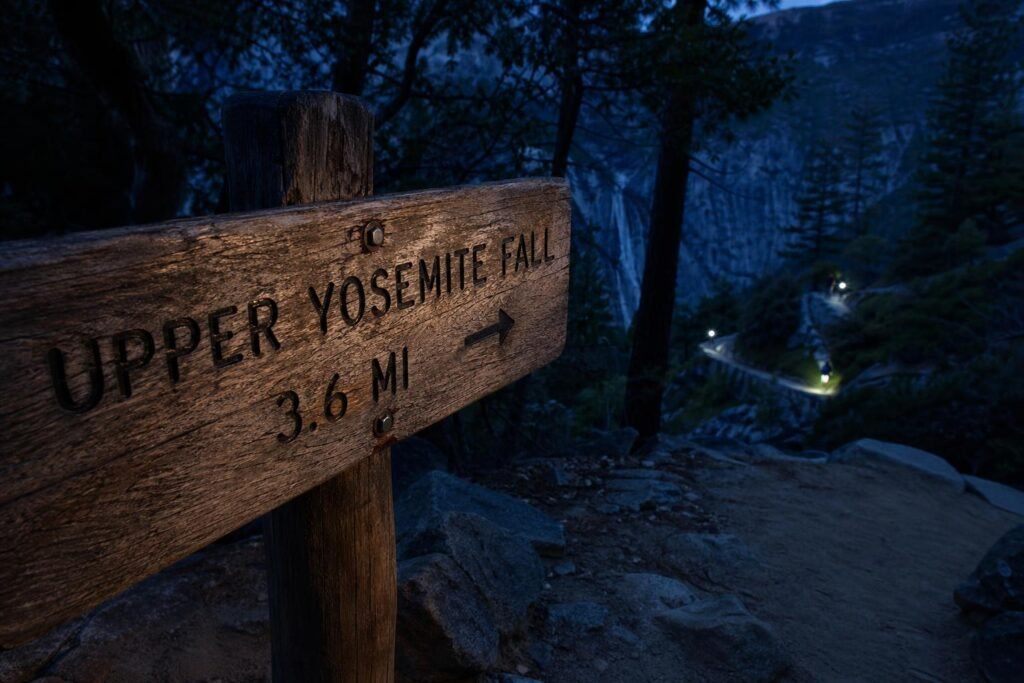
Worn wooden trail sign reading “Upper Yosemite Fall 3.6 mi” catches first light with a few headlamps visible on switchbacks in the dark forest behind
The shuttle is stop #7 (Yosemite Falls) or stop #E2 if you’re coming from Curry Village area. It runs year-round but frequency drops to hourly in winter. Spring and summer it’s every 10-15 minutes starting around 7am. The walk from the shuttle stop to the actual trailhead is about 200 yards.
Good news: you don’t need a permit for this hike. It’s a day hike on an established trail, so you just show up and go. The park entrance fee ($35 per vehicle, $30 per motorcycle, $20 per person on foot/bike) is your only required payment. If you have an America the Beautiful annual pass it covers you.
Bathrooms are at the trailhead and they’re actual vault toilets, not just a tree. Fill your water here because there’s nothing reliable on the trail until you reach Yosemite Creek near the top—and that requires filtering.
If you’re staying outside the valley in Mariposa or El Portal, add 45 minutes to an hour just to get to the trailhead parking area. Staying in the valley itself (camp or lodge) makes the early start much more manageable. I’ve done the drive from Mariposa for a 6am start. It’s doable but you’re waking up at 4:30am.
Winter access is weather-dependent. Northside Drive sometimes closes for snow and ice, which means you’d have to approach from the Village side and walk further. The trailhead itself doesn’t close, but once snow hits the trail becomes an entirely different animal requiring microspikes at minimum, often crampons and ice axes for the upper sections.
One thing nobody tells you: if you’re here in May or June during peak runoff, expect to get absolutely soaked even in the parking lot. The spray from Lower Yosemite Falls carries hundreds of feet and you’ll see people’s cars coated in mist. Bring a dry layer to change into for the drive home.